Background#
Continuously organizing notes
Reference articles:
Installing Docker#
apt-get install docker.io -y
Then use the docker -v command to verify if the installation is complete:

Changing the Mirror#
- Netease Accelerator: http://hub-mirror.c.163.com
- Official China Accelerator: https://registry.docker-cn.com
- USTC Mirror: https://docker.mirrors.ustc.edu.cn
You can configure your own mirror accelerator on Alibaba Cloud:
Log in to the Alibaba Developer Platform, after logging in, go to Docker Image Repository
Select the Accelerator Tab, here you can see that the system has generated an exclusive accelerator address for us:
https://xxxxx.mirror.aliyuncs.com
vim /etc/docker/daemon.json
Basic configuration is as follows:
{
    "registry-mirrors": ["https://xxxxx.mirror.aliyuncs.com"],
    "graph": "/mnt/docker-data",
    "storage-driver": "overlay"
}
The last two lines are problems I encountered during use, it seems to be a software driver issue
Just add them, and then restart the docker service:
systemctl daemon-reload
service docker restart
That's it
Installing Pikachu#
There is no ready-made image source for the pikachu target, so we need to build it ourselves
git clone https://github.com/zhuifengshaonianhanlu/pikachu
cd pikachu
docker build -t "pikachu" .
Use the current directory kerfile to create an image, named pikachu. It should be in the same directory as the Dockerfile, note the dot at the end of the command
It will pull the lnmp environment, which is about 200M
docker run -it -d -p 8082:80 pikachu
- -i: Run the container in interactive mode, usually used with -t
- -t: Allocate a pseudo-tty for the container, usually used with -i
- -d: Run the container in the background and return the container ID
- -- name: Give the container a name
- -v /xxx:/yyy: Mount the xxx directory of the host to the yyy directory of the container
- -p: Specify the IP and port to be mapped, but only one container can be bound to a specified port
- Set the container's port mapping: docker run [-P][-p]
- containerPort only specifies the container's port, and the host's port is randomly mapped: docker run -p 80 -i -t /bin/bash
- hostPort specifies both the host's port and the container's port: docker run -p 8080:80 -i -t /bin/bash0
- ip specifies the IP and the container's port: docker run -p 0.0.0.0:80 -i -t /bin/bash
- ip:hostPort specifies both the IP, the host's port, and the container's port: docker run -p 0.0.0.0:8080:80 -i -t /bin/bash

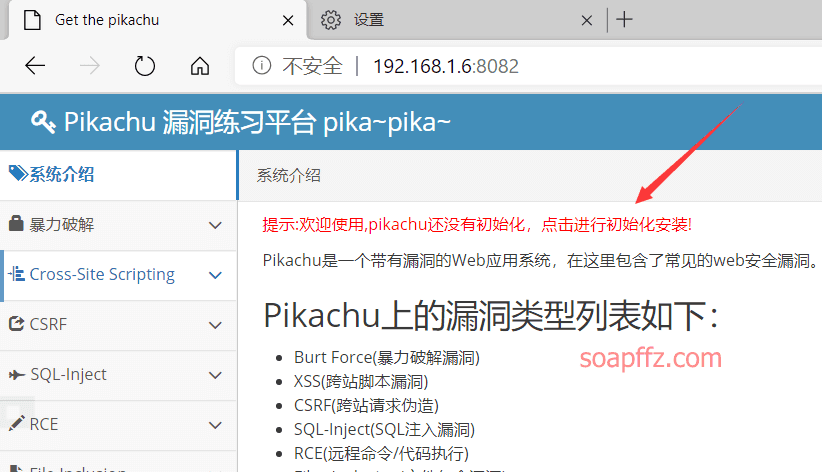
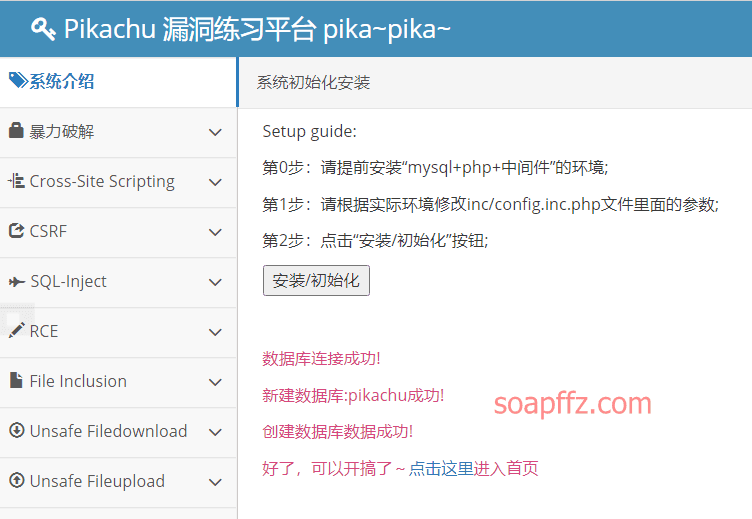
There is an initialization button on the homepage, click it to initialize
Setting up Burp#
You can follow the old method, search for proxy in the browser settings, and set the custom local and LAN proxy to 127.0.0.1:8080
You can also use the browser plugin SwitchySharp
After installation, customize a mode called burpsuite in the options
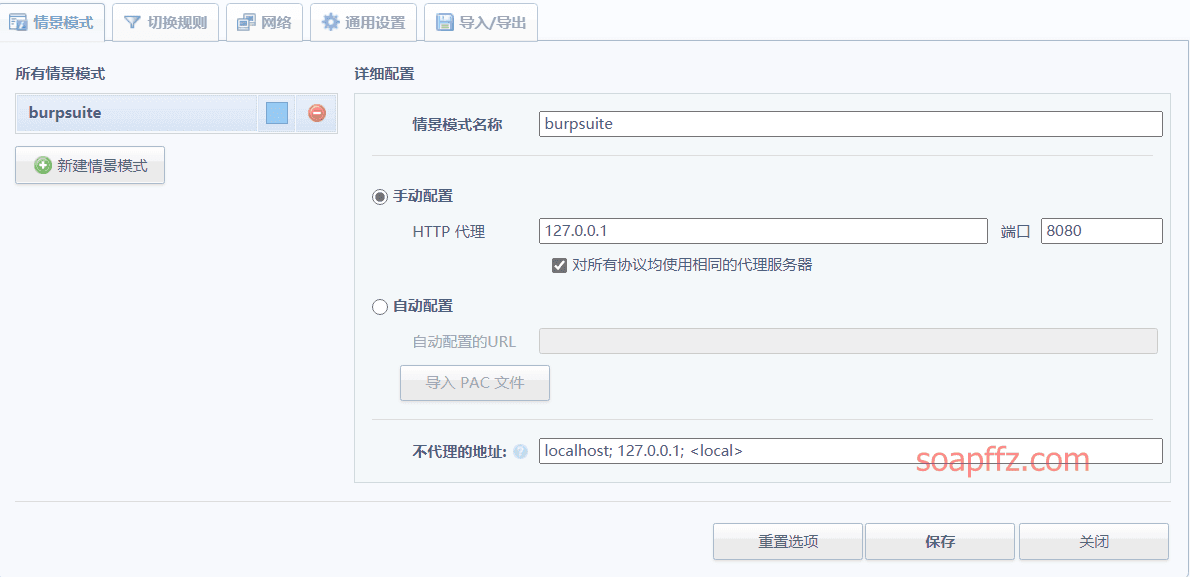
Then you can quickly switch modes in the upper right corner plugin icon
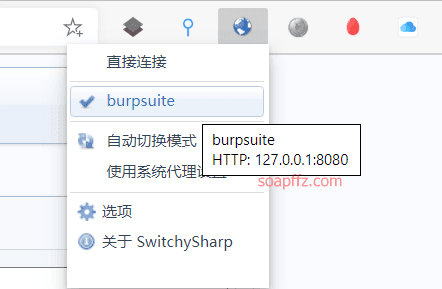
Usually use the system proxy settings, and switch to Burp with one click when interception is needed
Also, if your target machine's ip is local, Burp defaults to intercepting 127.0.0.1:8080
If, like me, the target machine is not on the local machine, then you need to set Burp to intercept all IPs
In the proxy tab, select the default 127.0.0.1:8080 in settings,
Click Edit on the left and change it to the second option All interfaces
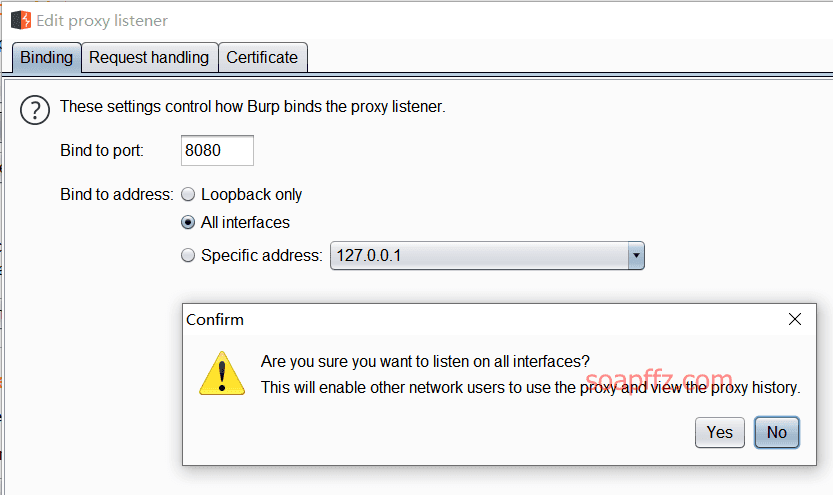
This way, responses with IPs that are not local can also be intercepted
Pikachu Target Token Form Brute Force#
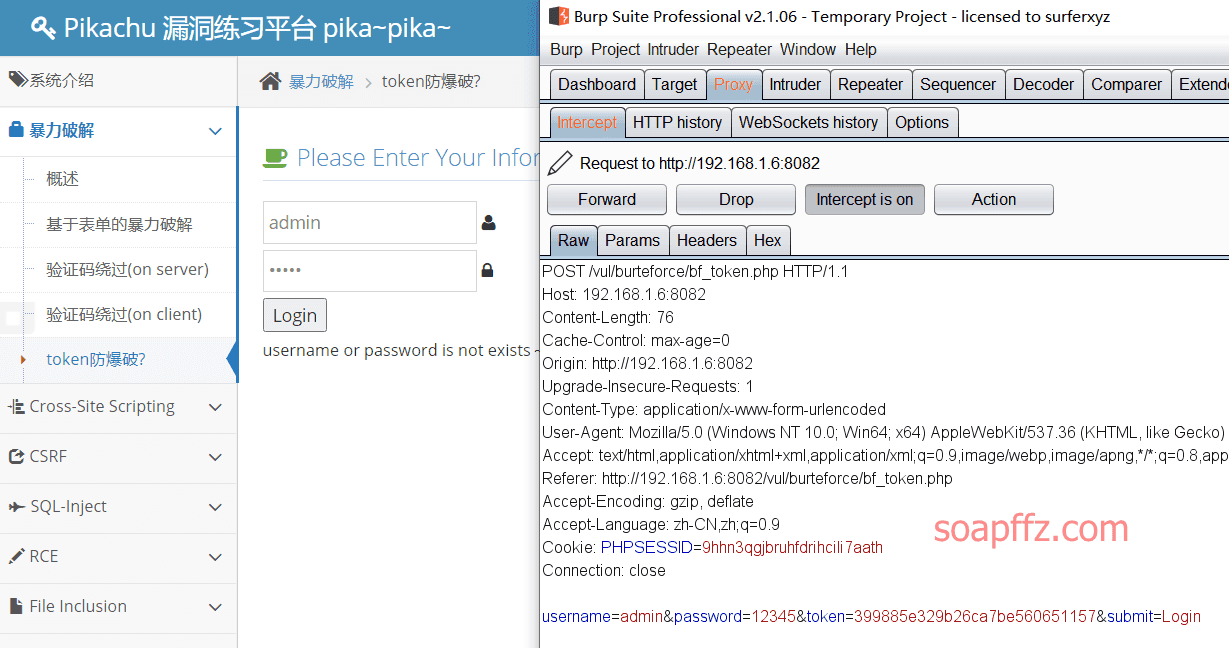
After setting up the proxy, select the target of brute force cracking on the Pikachu target, Token Anti-Brute Force?
Enable interception, fill in random data, and Burp intercepts the packets
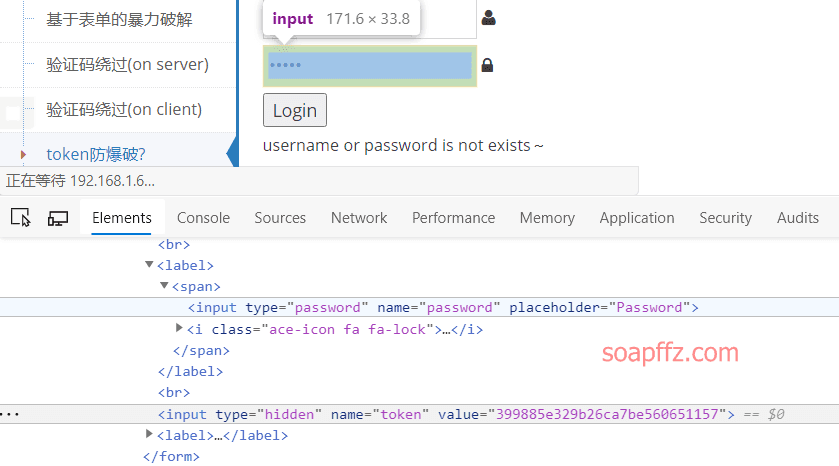
Press F12 to view the source code and find that the token value is written just below the login form
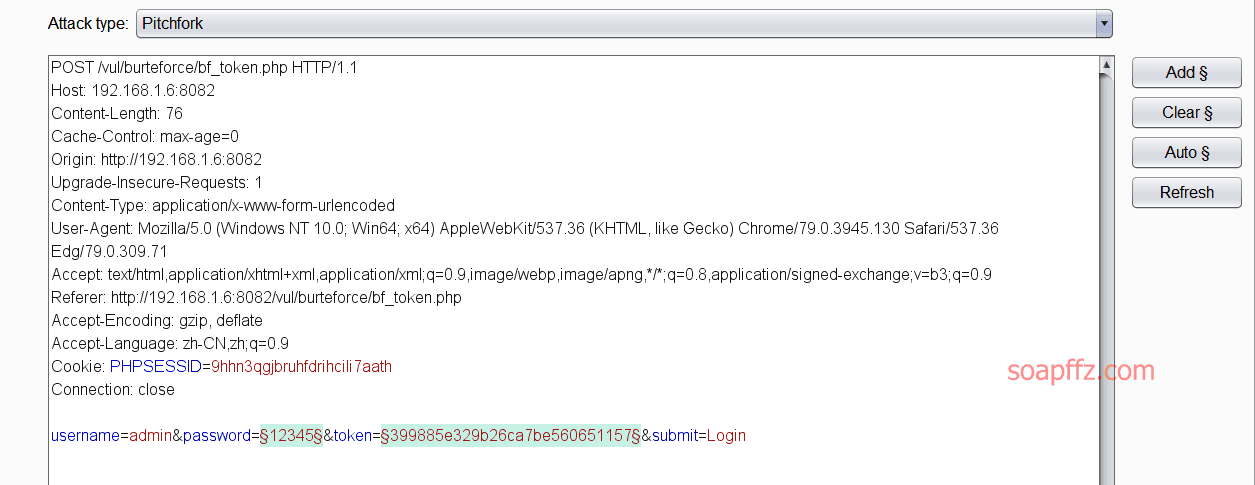
Right-click and send the request to Intruder
Guessing that the token value is only related to the password, we clear it
Only select password and token values, and set the attack mode Attack type to Pitchfork
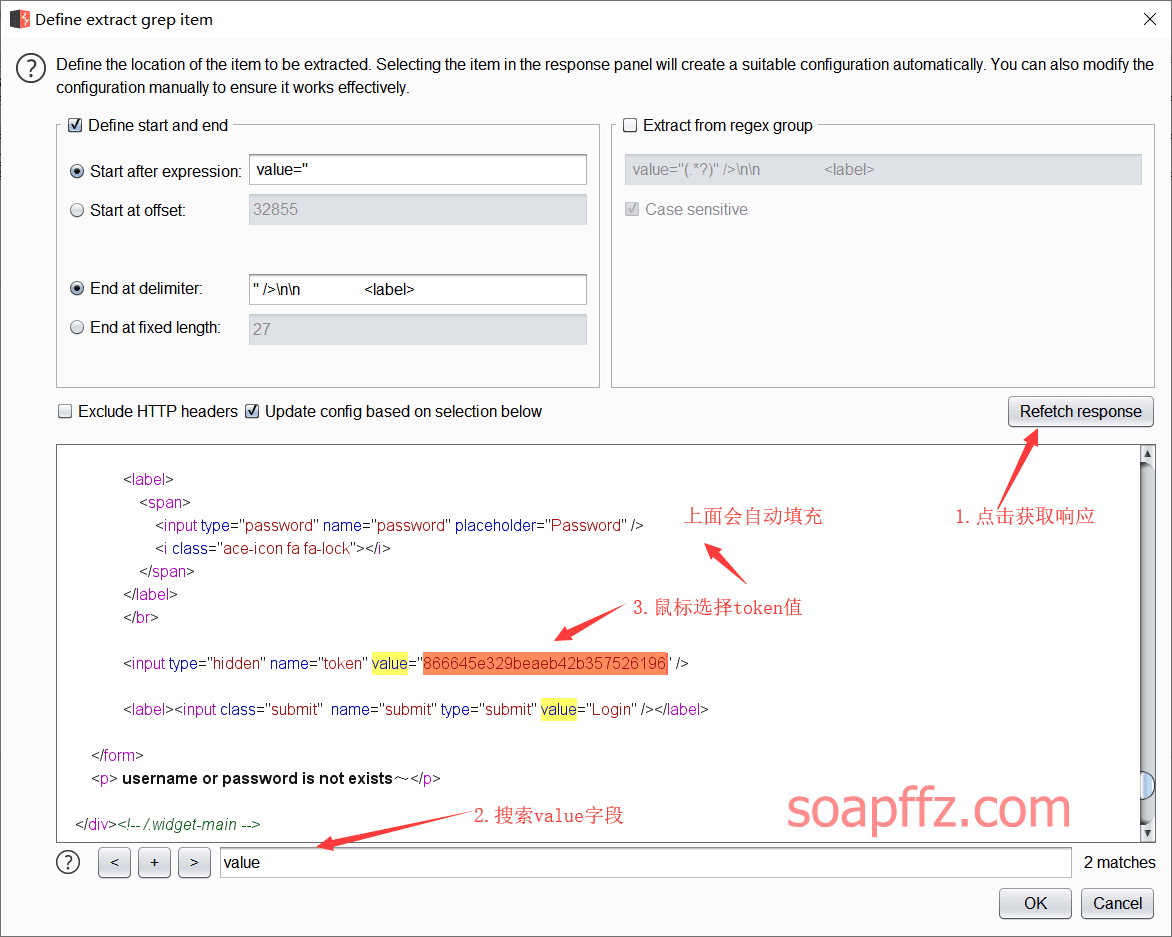
In the options tab, find Grep - Extract, click Add
Click Refetch response to make a request, and you can see the response message, directly select the string to be extracted
The start and end markers will be automatically filled in above.
Switch to the payloads tab, set the first payload to Simple list for dictionary mode
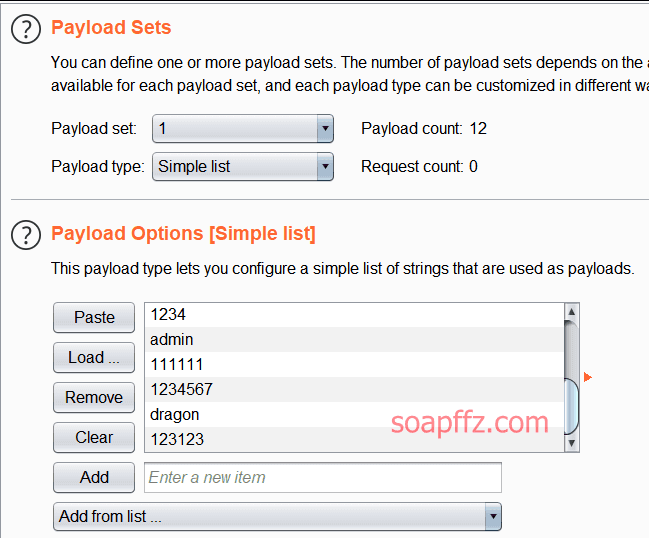
Add a dictionary below, and set the second payload to Recursive grep
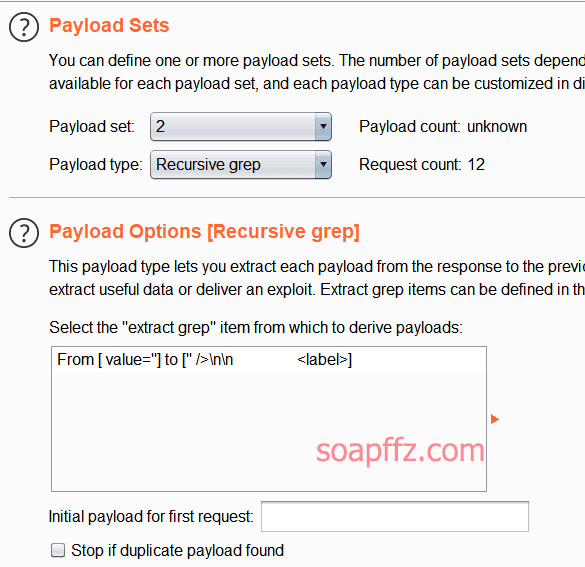
When there is a Recursive grep option in the payload, it does not support multithreading. In options, change the threads to 1
There is no problem with 1 thread at all, Burp sends packets very quickly, click Attack in the upper right corner to start the attack
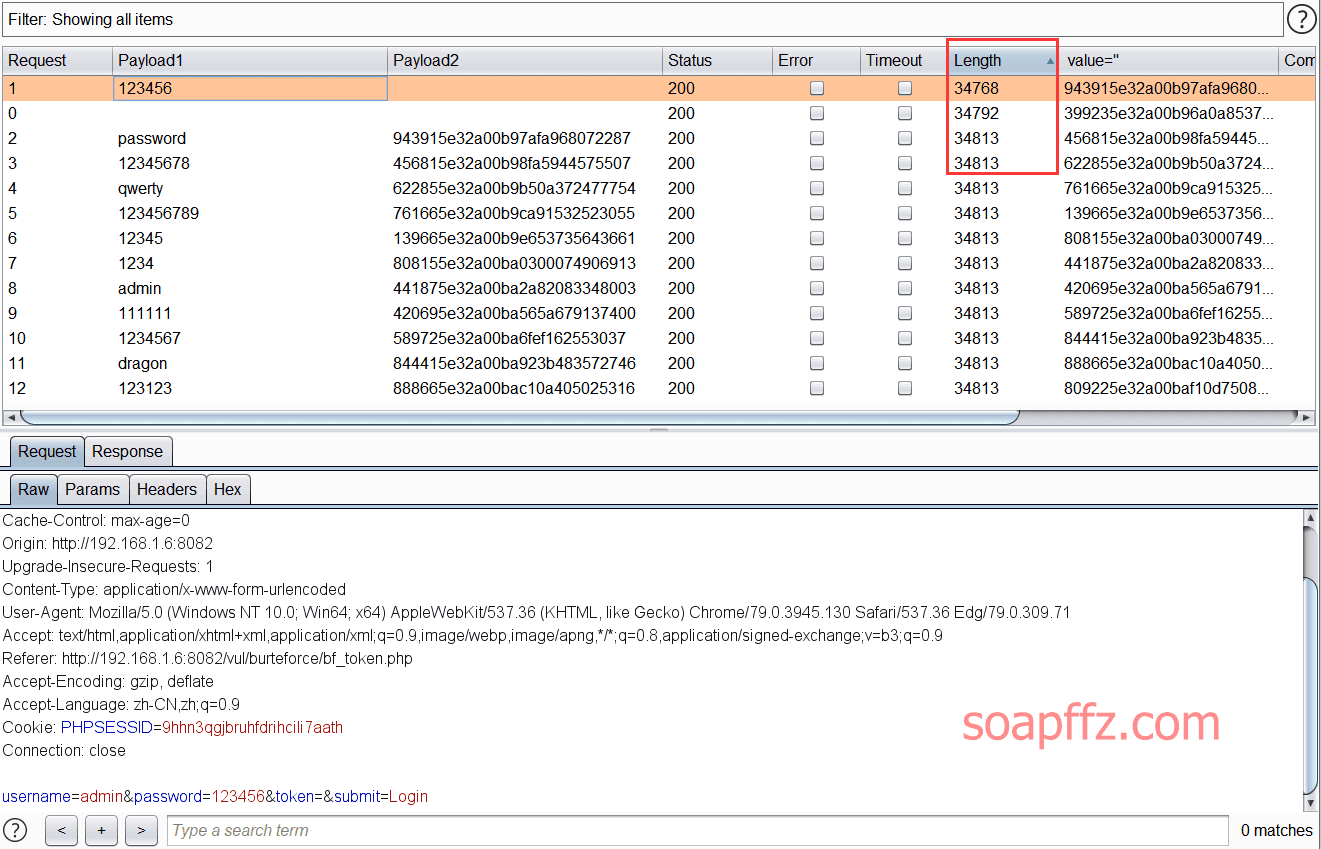
Brute force successful!
End of article.